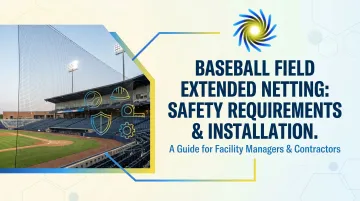
Introduction
Installing baseball field extended netting is a structurally demanding project requiring precise measurements, load assessments, and coordinated execution. A foul ball exceeding 100 mph can reach spectators in under one second. When netting fails, the cause is almost always inadequate structural anchors, undersized materials, or skipped validation steps.
Errors in coverage gaps, post placement, or netting tension don't just create liability — they put people in danger. Getting the installation right means understanding every requirement before a single post goes in the ground.
This guide is written for facility managers, athletic directors, parks and recreation departments, and school administrators responsible for specifying and installing extended protective netting at baseball and softball fields. It covers coverage zone requirements, structural and material specifications, step-by-step installation, and inspection protocols — whether you're responding to new safety mandates or upgrading what's already in place.
Key Takeaways
- Extended netting must reach at least to the far end of both dugouts
- Many facilities now extend coverage to or beyond the foul poles for added protection
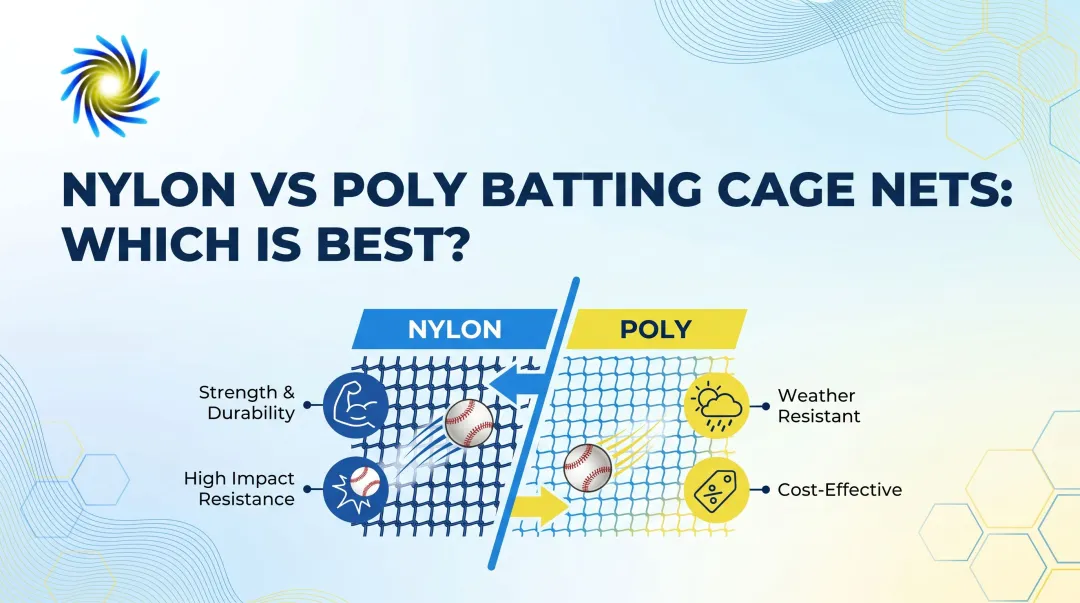
- Knotted nylon (durable, cost-effective) and Dyneema (thin-strand, high-visibility) are the two primary netting materials
- Structural anchors, cable suspension systems, and post placement must be confirmed before installation begins
- Post-installation validation—checking tension, coverage gaps, and hardware torque—is required before the field opens
- Professional consultation and correct material sizing are non-negotiable — both are leading factors in netting failures when overlooked
Why Baseball Fields Need Extended Netting: The Safety Case
Foul balls traveling at speeds exceeding 100 mph can reach spectators in approximately 0.8 seconds—far faster than human reaction time allows for self-protection. Research analyzing medical care reports from three MLB stadiums found 0.42 to 0.55 foul-ball injuries per game serious enough to warrant first-aid treatment, with Bloomberg estimating approximately 1,750 fans injured annually at MLB games. Children are disproportionately represented among serious injuries.
The Regulatory Timeline
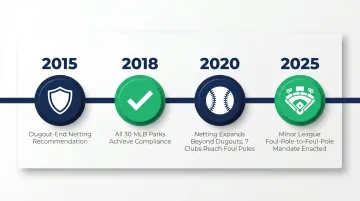
MLB's progression on extended netting has established a cascading standard across all levels of play:
- 2015: MLB recommended all teams extend netting to at least the far end of both dugouts
- 2018: All 30 MLB ballparks confirmed compliance with dugout-to-dugout coverage
- 2020: Commissioner Manfred expanded requirements to "substantially beyond" dugouts, with 7 clubs extending to foul poles
- 2025: Minor League Baseball mandated foul-pole-to-foul-pole netting at all 120 affiliated ballparks by Opening Day
What "Extended Netting" Means for Amateur Facilities
For non-MLB facilities, the baseline recommendation is coverage from the backstop down both foul lines to at least the dugout ends. The extended zone should continue further based on seating proximity, grandstand geometry, and ball trajectory patterns. Many high schools and municipal parks now plan coverage to the point where stands angle away from the field.
Liability and Due Diligence
The traditional "Baseball Rule" defense—which limited facility liability if protected seats and warnings were provided—is eroding in courts nationwide. Courts in multiple states have declined or limited this defense, including:
- Idaho (2013) and Ohio (2007): Early rulings that narrowed the Baseball Rule
- California (2020): Expanded spectator protection obligations
- Iowa: Resulted in a $1.05 million award against a facility
Facilities failing to meet recognized safety standards face real legal and financial exposure.
The Viewer Experience Factor
Modern netting materials like thin-strand Dyneema achieve 94-95% see-through visibility versus traditional heavy nylon. Dyneema netting's 1.4 mm strand diameter is less than half the 2.72 mm of #36 knotted nylon, reducing visual obstruction enough to put the "netting blocks the view" objection to rest.
Installing Baseball Field Extended Netting: A Complete Guide
A properly executed extended netting installation follows four sequential phases. Skipping or rushing any one of them typically results in sagging, coverage gaps, or structural failure — problems that only become obvious once a ball is already in the air.
Prerequisites and Safety Considerations
Structural Capacity Verification:
Before installation begins, confirm that existing backstop posts, foul-line poles, or standalone netting poles have sufficient load-bearing capacity for the combined weight of netting, cable, and wind load. For new pole installations, engineering discussions for 40-foot-tall systems spanning 65 feet have referenced 36-inch diameter by 15-foot deep drilled piers as foundation examples.
Critical Compatibility Checks:
- Verify netting panel dimensions match measured coverage zone, accounting for top overhang, side drape, and bottom clearance
- Confirm cable gauge, eye bolt ratings, and rope border strength are rated for expected impact loads
- Ensure structural anchor points meet load requirements before proceeding
Non-Negotiables:
- Never install netting during high winds
- Secure all ground-level anchoring before elevated work begins
- No netting is operational until tension, coverage, and hardware checks pass
Tools and Hardware Required
Essential Components:
- Suspension cable (stainless steel, 1/4-inch to 3/8-inch diameter typical for amateur fields)
- Cable clamps and thimbles
- Eye bolts and turnbuckles (load-rated; Crosby HG-228 turnbuckles range from 800 lbs WLL at 5/16-inch to 10,000 lbs at 1-inch thread diameter)
- Rope-bordered netting panels (custom-cut to field dimensions)
- Carabiners or snap hooks for panel attachment
- Tension gauge
- Come-along or cable puller
- Drill with masonry/concrete bits (for concrete anchoring)
- Ladder or aerial lift
- Measuring tape
- Safety harness for elevated work
Substituting non-rated hardware is a serious safety risk. 7x19 galvanized aircraft cable provides working load limits from 840 lbs (3/16-inch) to 2,880 lbs (3/8-inch) at a 5:1 safety factor. Only use components with published load ratings.
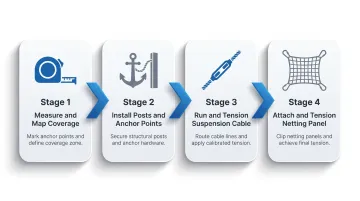
Step-by-Step Installation
Step 1 — Measure and Map Coverage
Walk the full netting run with a tape measure and record:
- Exact span from backstop to foul-line terminus
- Pole heights at all attachment points
- Irregular angles or obstructions (lighting fixtures, dugout rooflines, press boxes)
Use these measurements to confirm or adjust the netting panel order before fabrication is finalized.
Step 2 — Install Posts and Anchor Points
- Set any new netting poles in concrete footings to the required depth (determined by pole height and local wind load requirements)
- Install eye bolts or anchor plates at all cable attachment points
- Allow concrete to cure fully before applying cable tension
Step 3 — Run and Tension Suspension Cable
- Thread stainless steel cable along the top run between anchor points
- Secure with thimbles and cable clamps at each end
- Use turnbuckles to achieve correct tension — cable should be taut but not over-tensioned
- Check alignment across the full span before attaching netting
Step 4 — Attach and Tension the Netting Panel
- Hang the rope-bordered netting panel from the suspension cable using evenly spaced snap hooks or carabiners
- Work from the center outward to distribute weight evenly
- Secure bottom and side edges to posts or ground anchors
- Adjust tension across the panel to eliminate sag
- Maintain appropriate drape angles at panel edges to close any remaining coverage gaps
Post-Installation Checks and Validation
Visual and Structural Inspection:
Walk the full netting perimeter and check for:
- Coverage gaps at panel edges, bottom clearance, and top-of-netting height
- Any sections of sag that could allow a ball to deflect through
- Proper cable clamp torque and snap hook closure
Functional Validation:
Have a trained person walk every spectator section behind the netting. Confirm that no seating area within the designated protection zone has a direct line of sight to the field that bypasses the net.
Installations that skip structured checks often miss hardware gaps, sections with insufficient tension, or edge gaps. These problems typically surface only after the first ball impact — by which point an injury may have already occurred.
Common Installation Problems and Fixes
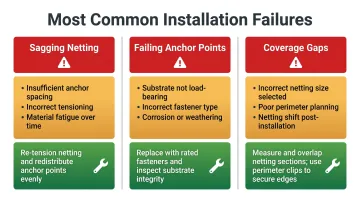
Sagging Netting Mid-Span
Problem: Netting visibly droops between posts, creating a low-tension zone that reduces effective coverage height.
Likely Cause:
- Insufficient suspension cable tension
- Cable gauge too light for span length
- Too few intermediate support points
Fix: Increase cable tension using turnbuckles. Add intermediate support posts or mid-span cable hangers if the span exceeds the recommended unsupported distance for the cable gauge in use.
Inadequate or Failing Anchor Points
Problem: Posts lean, eye bolts pull loose, or anchor footings shift—causing netting to go slack or collapse.
Likely Cause:
- Posts set in undersized footings
- Concrete not fully cured before tensioning
- Hardware rated below actual load demand
Fix: Do not proceed until replacement anchor points are properly installed and cured. Retrofit solutions such as ground anchors or concrete-encased post bases may be required.
Coverage Gaps at Netting Edges
Problem: Gaps appear between the netting panel edge and adjacent structure (backstop frame, foul pole, dugout wall).
Likely Cause:
- Netting panel not fabricated to correct custom dimensions
- Installation didn't account for overlapping or tying the panel edge to adjacent structures
Fix: Order a correctly dimensioned replacement panel or add a fill panel; use rope lashing or outdoor-rated zip ties to secure panel edges and eliminate the opening.
Catching these issues early—before tensioning is complete or the field goes back into use—prevents more costly repairs down the line. When problems involve structural components like post footings or anchor hardware, professional assessment is the safer call.
Pro Tips for Installing Extended Netting Effectively
Installation Timing and Sequencing:
Always install and tension the suspension cable system first and verify it holds rated load before attaching any netting panels. Tensioning after netting is attached creates uneven panel tension and complicates the entire process.
For facilities with grandstands or complex geometry—where cable routes must work around structural columns and tiered seating—professional installation typically saves significant rework time. The Windscreen Factory's installation team handles custom netting configurations for exactly these situations.
Material and Environmental Handling:
Nylon netting should be unrolled and allowed to relax at ambient temperature before installation, especially in cold weather, as cold nylon is less pliable. Knotted nylon and Dyneema panels should be inspected for damage before installation—installing a panel with a broken border rope or damaged mesh section is a rework risk.
Document and Sign Off:
Photograph the completed installation from all spectator sections before the first game. Record the following as part of your baseline documentation:
- Pole placements and anchor point locations
- Cable tension readings at each connection
- Hardware torque values for bolts and clamps
This documentation gives you a baseline for future inspections and a clear record of safety due diligence.
Conclusion
Extended netting quality determines whether spectators are genuinely protected. A net that sags, has edge gaps, or is attached to undersized hardware provides false security. The safety outcome depends on disciplined execution from site assessment through post-installation validation.
That execution starts with treating extended netting as a structural project — not a field accessory. Facility managers and athletic directors should apply the same planning rigor here as they would to any other infrastructure improvement. When site complexity or load requirements exceed in-house capability, working with a professional netting installer like The Windscreen Factory — which handles design, fabrication, and on-site installation for schools, parks, and athletic complexes nationwide — ensures the system is built to perform, not just appear compliant.
Frequently Asked Questions
Why did MLB add netting?
MLB expanded netting in response to a documented increase in fan injuries from foul balls, including serious incidents at multiple stadiums. Research found 0.42 to 0.55 foul-ball injuries per game requiring first-aid, combined with foul ball velocities exceeding 100 mph that leave fans only 0.8 seconds to react.
What is baseball netting called?
Baseball protective netting goes by several names: backstop netting (behind home plate), extended or spectator netting (running down the foul lines), barrier netting (containment along field perimeters), and batting cage netting (enclosed practice tunnels).
Do all MLB ballparks have netting?
As of 2020, all 30 MLB ballparks have extended protective netting reaching substantially beyond the dugout ends, with 7 clubs extending all the way to the foul poles. Minor League Baseball has mandated foul-pole-to-foul-pole coverage at all 120 affiliated ballparks by 2025 Opening Day.
How far should extended netting reach on a baseball field?
MLB's baseline standard is coverage to at least the far end of both dugouts, but best practice for facilities with close spectator seating is to extend toward the foul poles. Coverage length should account for seating proximity, typical ball trajectory patterns, and how densely spectators are packed near the field.
What netting material is best for baseball field extended netting?
The two main options are knotted nylon — heavier, highly durable, and cost-effective for high-impact or youth facilities — and Dyneema/HMPE twine, which uses a 1.4 mm strand and delivers 94% visibility. Choose based on impact frequency, budget, and how much visual obstruction your venue can tolerate.